The webform is a free feature that allows you to redirect website responses as tasks into a dedicated Rock space. This can be useful to more intuitively manage contact forms, newsletter or event signups, collect feedback or manage new leads.
This dedicated product guide explains how to can create a new webform on Rock and the required steps to add it to your website.
How to add a new webform in your Rock space
There are two different locations where you can create a new webform. Note that for the feature to appear you must have admin permissions within the space.
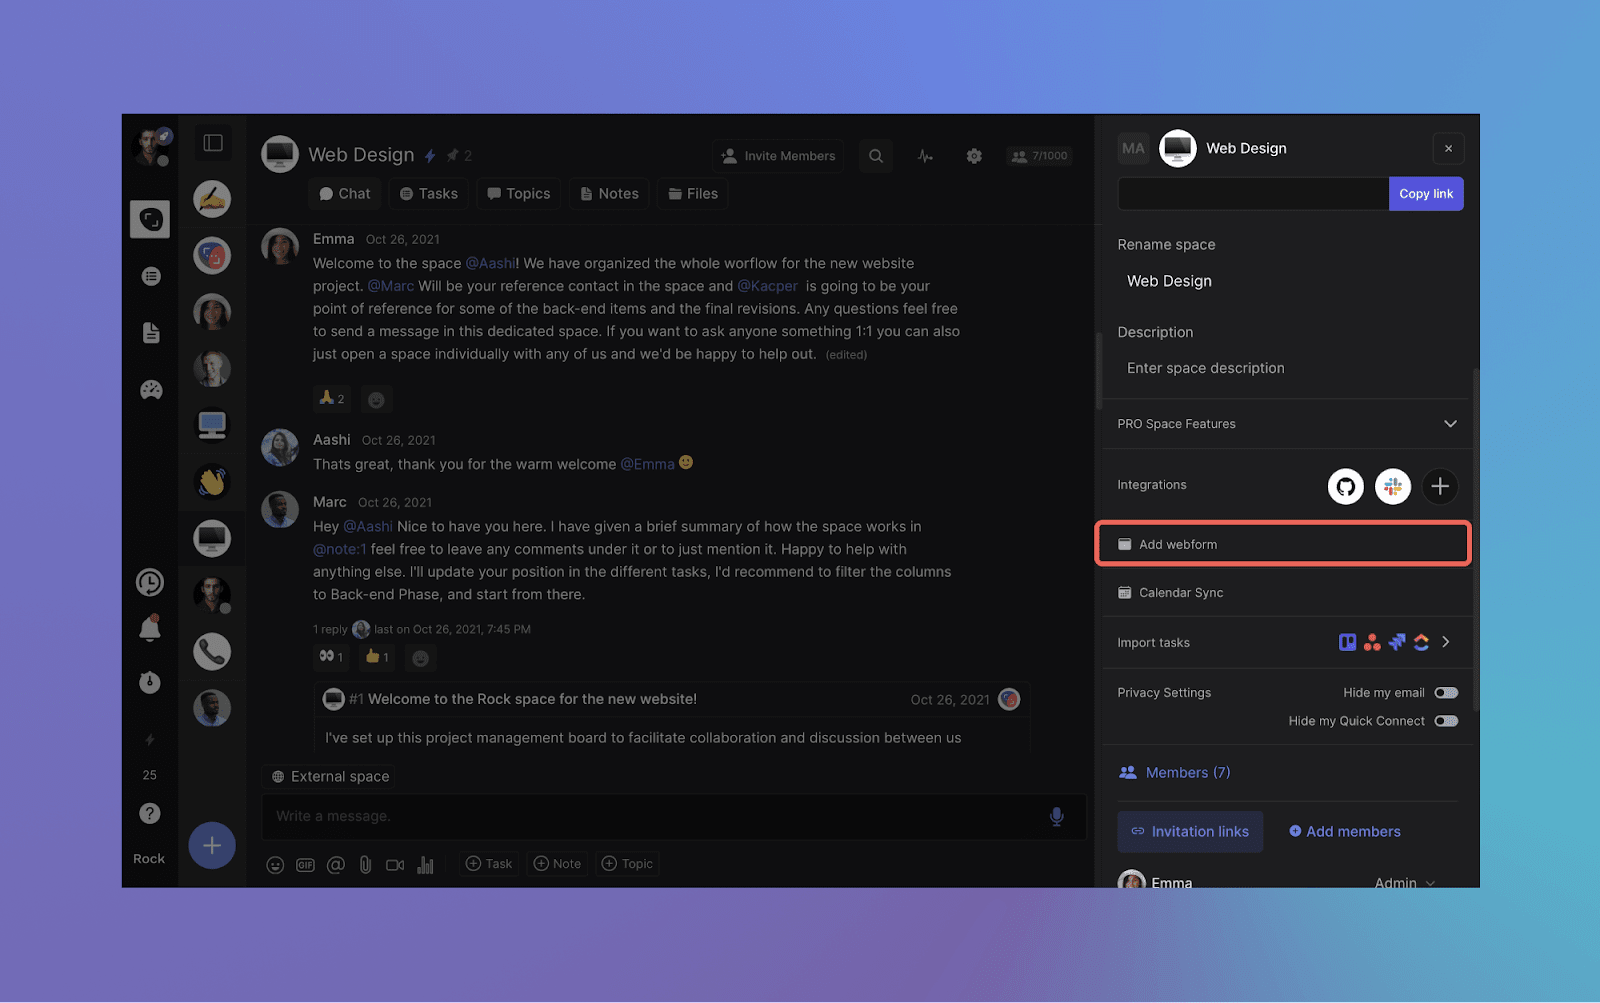
The first place where you can add a new form is through space settings. To access the feature, click on settings at the top right corner of your space and scroll down to “Add webform”.
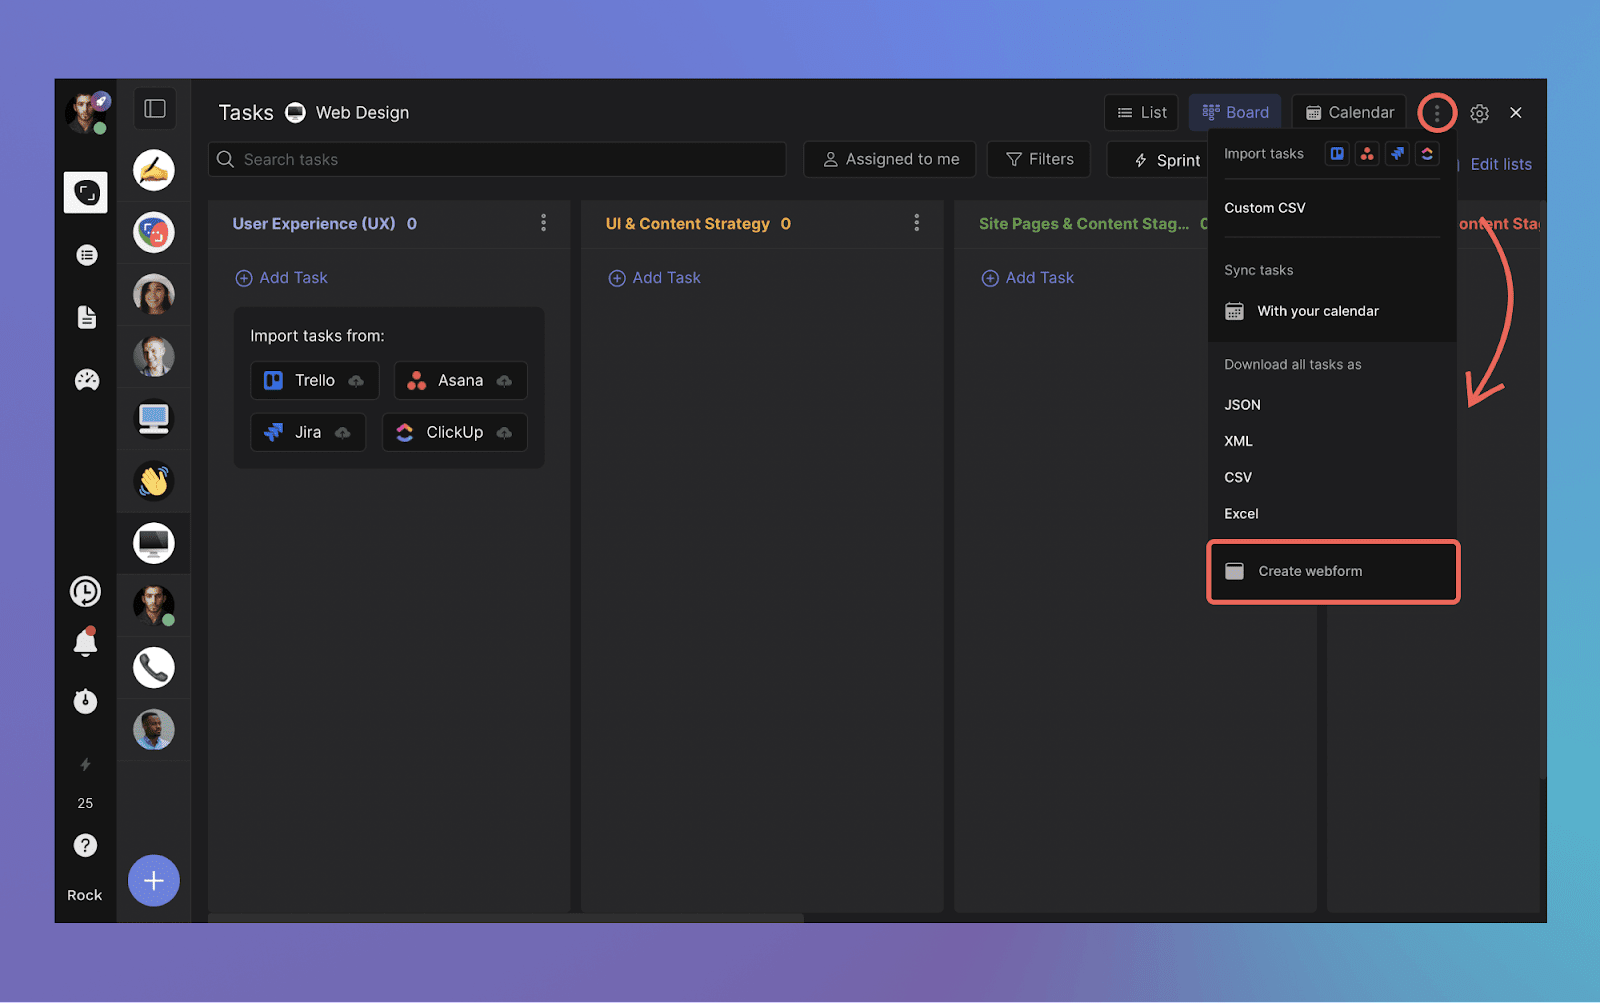
A second location where you can create a new webform is the Tasks mini-app. When entering a space click on tasks -> Select the three dots in the top right corner of the view -> Select “create webform”.
After creating your new webform you can configure three fields to your liking:
- [Required] Name: This name will display next to the bot on your space (so you know which one to edit when making future changes to your webform). This name is not visible on the live webform.
- [Optional] Label: Add a dedicated label to newly created tasks (i.e. “website lead” or “webinar signup”)
- [Required] List: Pick a list from your space where new responses should be added (i.e. “To do”, “Website leads” or “new signups”)
Select “generate webform” after you have completed configuring to create the webform.

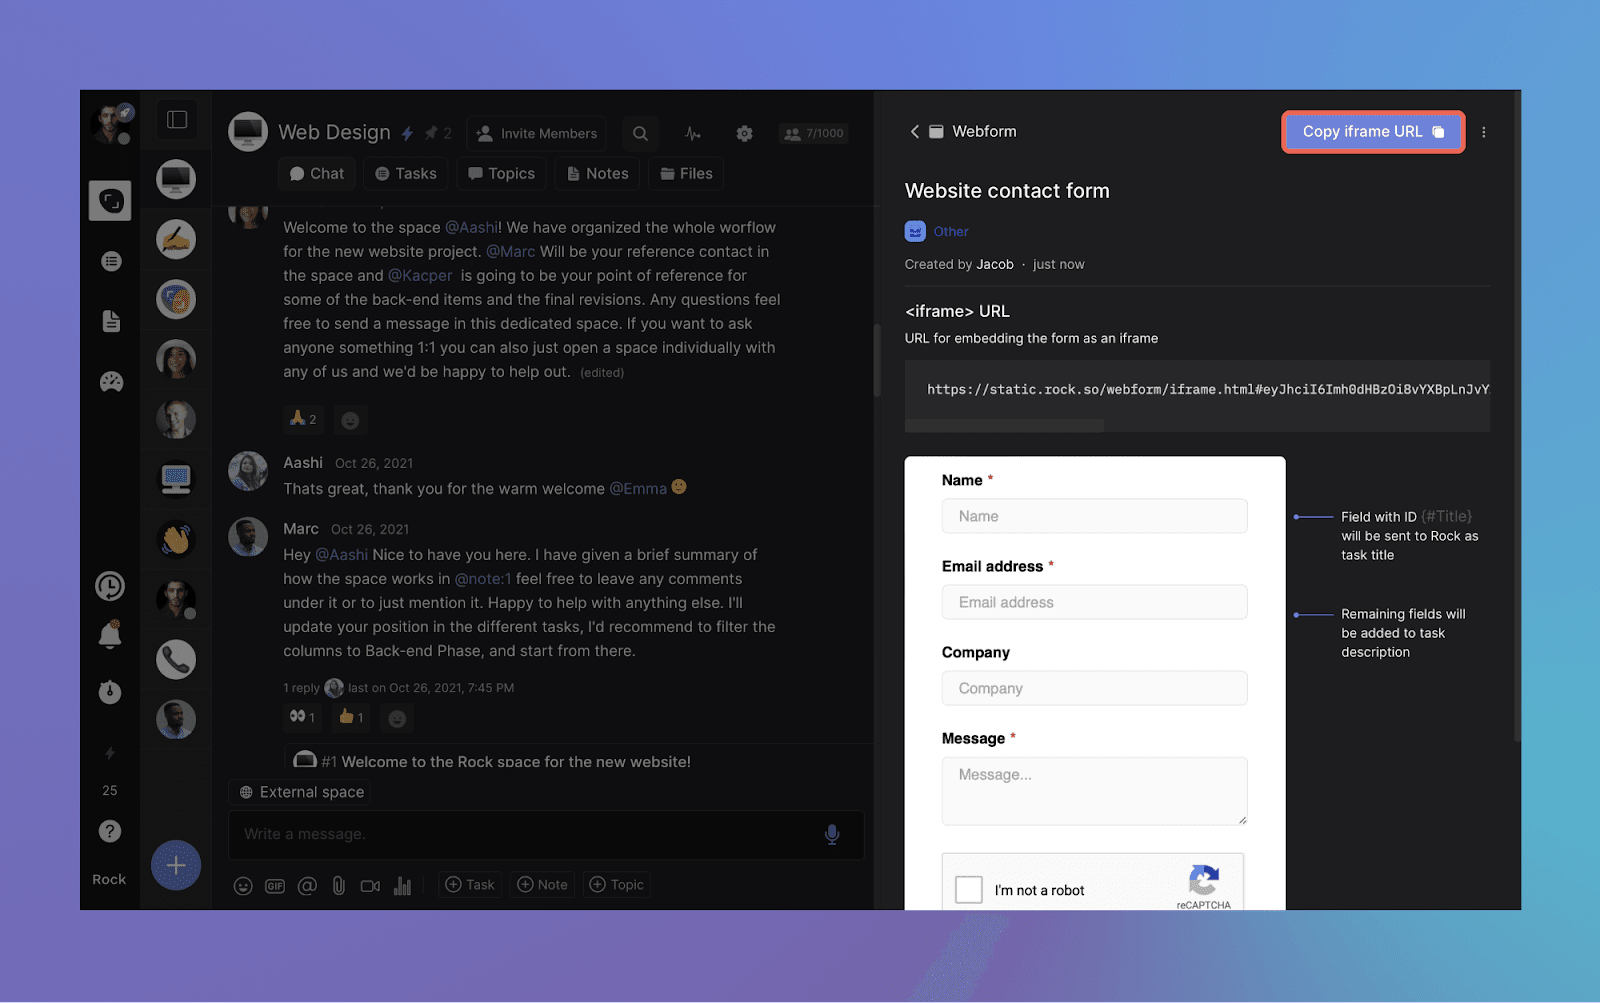
Once the webform has been created, you will receive a URL that has to be added to your website through an embeddable iframe.
Embedding a webform into your website
Rock’s webform feature works with iframe. When the webpage containing this iframe is loaded, it will create a window within the page that displays the webform. You can also specify the size and other attributes of the iframe using HTML or CSS.
Adding the webform might look different depending on the CMS you are using. Here is a short summary for working with Wix, a hardcoded site, Webflow and Wordpress.
How to embed a webform in Wix
To embed an iframe with the Wix CMS, follow these steps:
- Go to your Wix Editor and open the page where you want to add the iframe.
- Click on the Add (+) button in the left-hand side menu and select "More."
- Select "HTML Code" from the list of options.
- In the HTML Code box, paste the code for your iframe. For example: <iframe src="Rock-webform-URL"></iframe>. Replace "Rock-webform-URL" with the URL of the website you want to embed.
- Click "Update" to save your changes.
Note that the process for embedding an iframe with Wix may vary depending on your specific use case and the type of iframe you want to embed. Make sure to test your embedded content to ensure it works as intended.
How to embed a webform in a hardcoded HTML website
To embed an iframe in a hardcoded HTML website, follow these steps:
- Open your HTML file in a code editor.
- Find the place in your HTML code where you want to embed the iframe.
- Create an iframe element by typing the following code: <iframe src="Rock-webform-URL"></iframe>. Replace "Rock-webform-URL" with the URL of the website you want to embed.
- Customize the iframe element to your liking by adding attributes such as height, width, frameborder, etc. For example: <iframe src="Rock-webform-URL" width="100%" height="500" frameborder="0"></iframe>
- Save your HTML file and open it in a web browser to test the embedded iframe.
How to embed a webform in wordpress
To embed an iframe in WordPress:
- Go to the page or post where you want to add the iframe.
- Click on the "Text" tab in the editor to switch to the text editor.
- Find the place in the content where you want to embed the iframe.
- Create an iframe element by typing the following code: <iframe src="Rock-webform-URL"></iframe>. Replace "Rock-webform-URL" with the URL of the website you want to embed.
- Customize the iframe element to your liking by adding attributes such as height, width, frameborder, etc. For example: <iframe src="Rock-webform-URL" width="100%" height="500" frameborder="0"></iframe>
- Switch back to the "Visual" editor to preview the embedded iframe.
- Publish or update the page or post to save the changes.
Note that some WordPress themes or plugins may restrict the use of iframes for security reasons. If you encounter issues embedding iframes, you may need to consult your theme or plugin documentation.
How to embed a webform with Webflow
To embed an iframe in Webflow, follow these steps:
- Open your Webflow project and go to the page where you want to embed the iframe.
- Drag an Embed element from the Elements panel onto the canvas where you want to place the iframe.
- Double-click the Embed element to open the Embed settings.
- In the Embed settings, click the "</>" button to switch to code view.
- Create an iframe element by typing the following code: <iframe src="Rock-webform-URL"></iframe>. Replace "Rock-webform-URL" with the URL of the website you want to embed.
- Customize the iframe element to your liking by adding attributes such as height, width, frameborder, etc. For example: <iframe src="Rock-webform-URL" width="100%" height="500" frameborder="0"></iframe>
- Click "Save and Close" to save the Embed settings and close the code view.
- Preview the page to test the embedded iframe.
- Publish the website to make the embedded iframe live.
Webform in action
Curious about what the webform looks like in action? Check out our support page to see a webform live on our website!

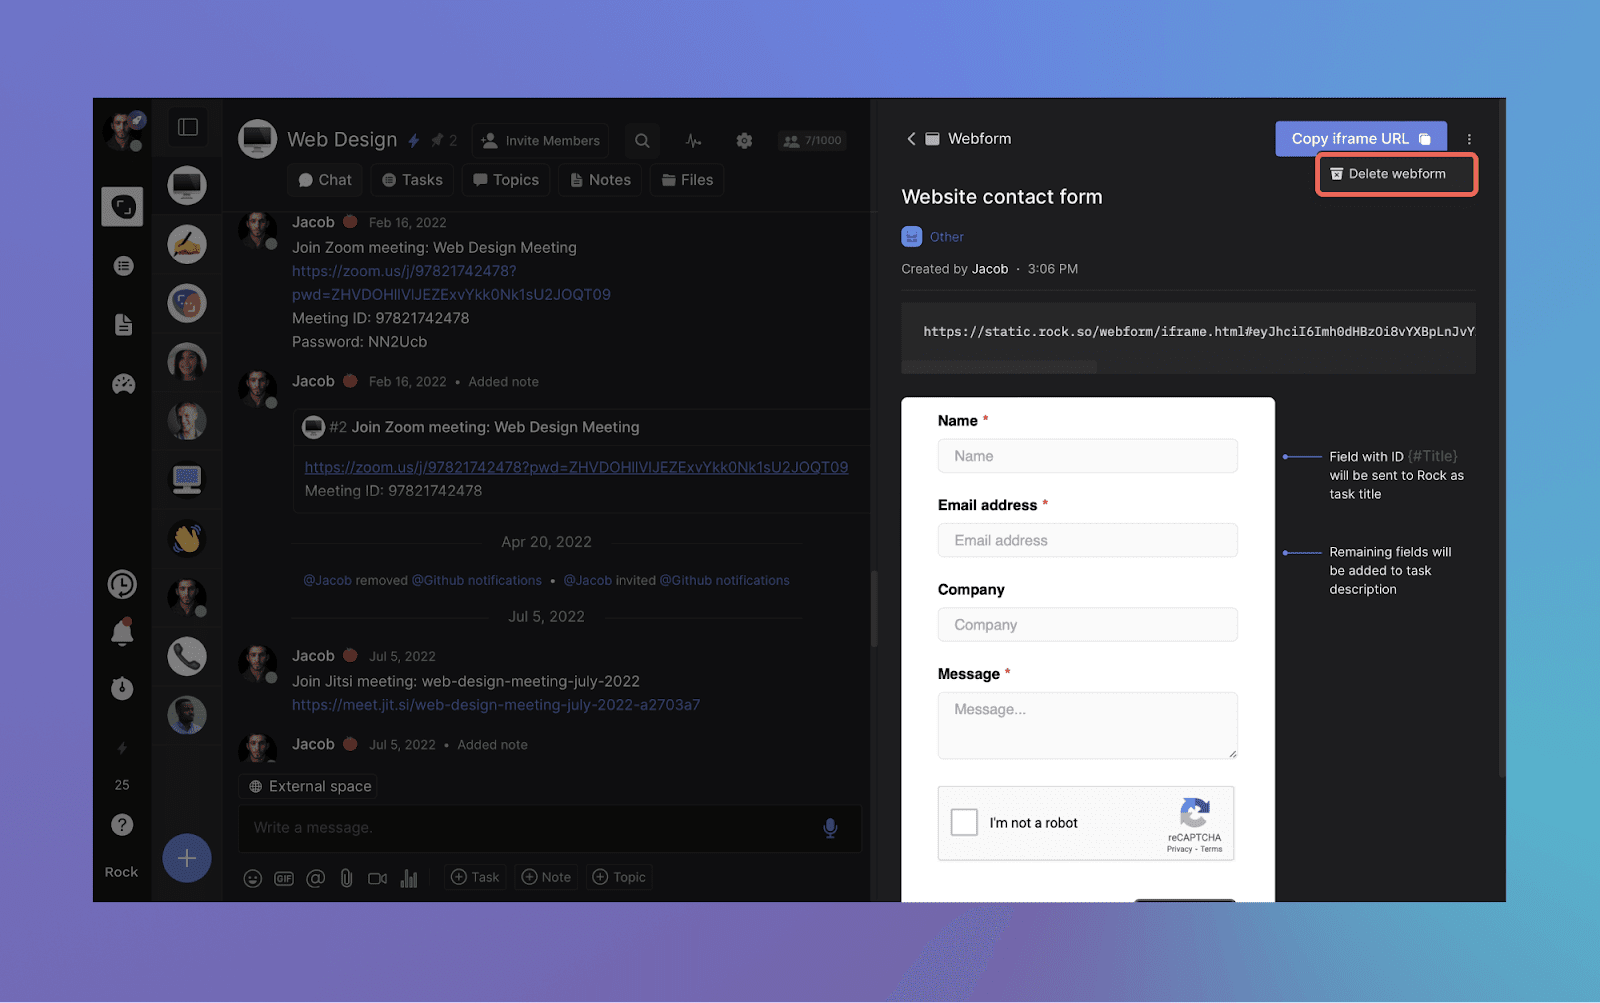
Removing your webform on Rock
To remove a webform from Rock, navigate to the webform panel by going to space settings -> Webforms.
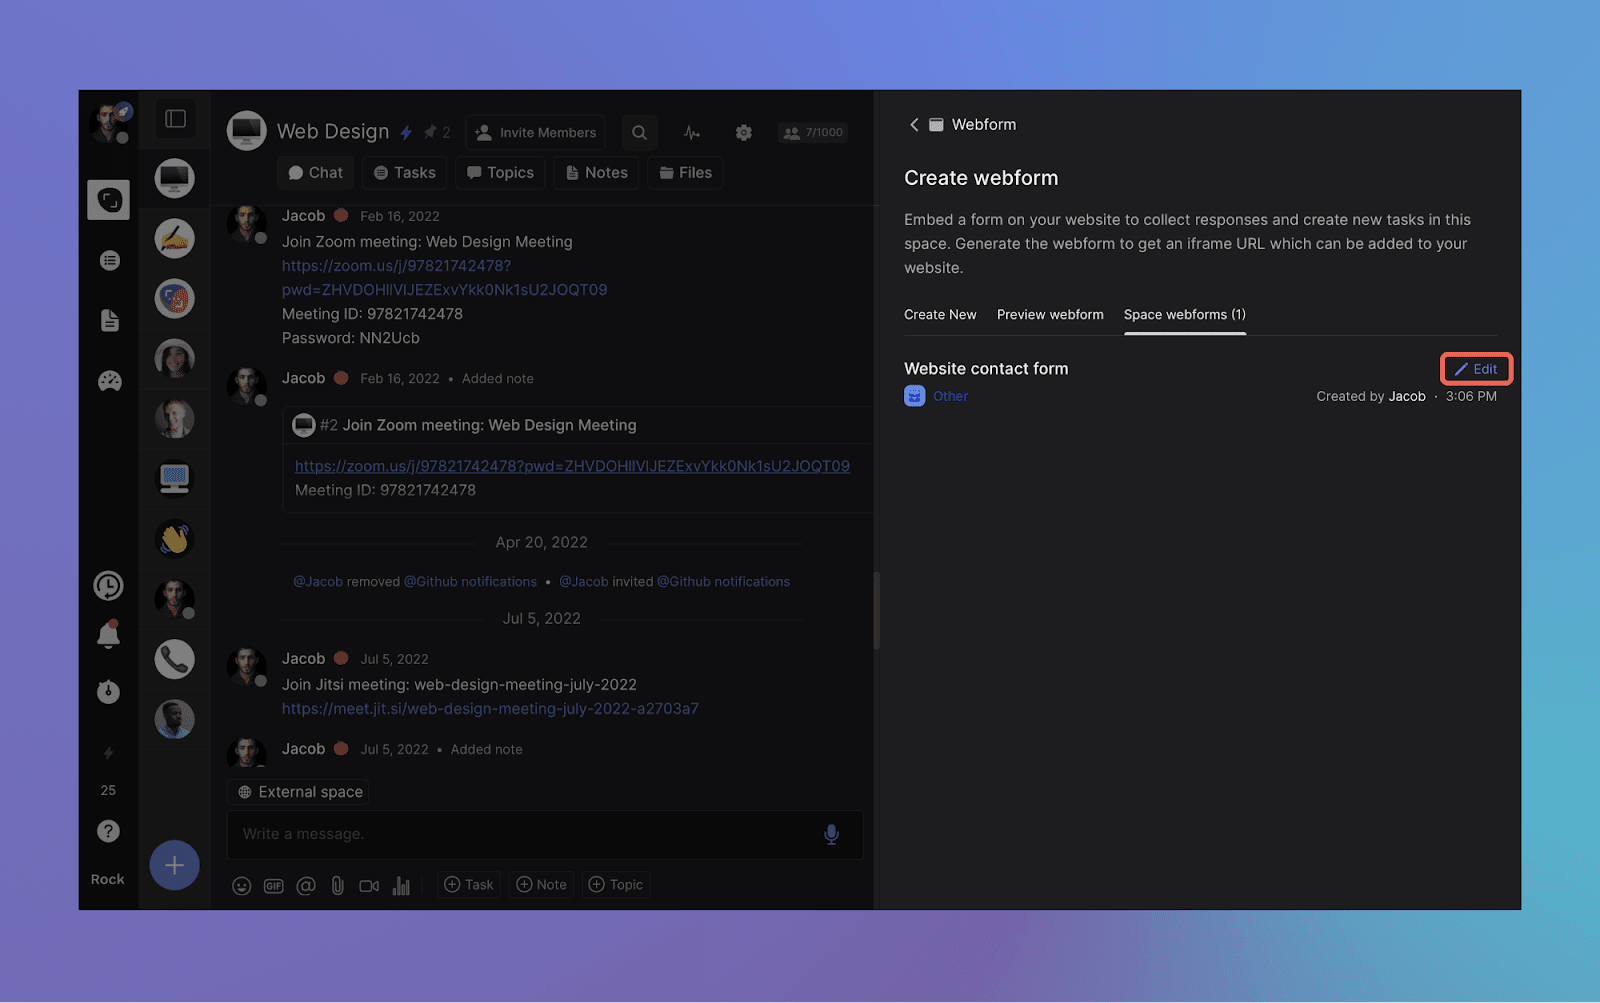
A new panel opens with the configuration of your webform. Click on the three dots in the top right corner to remove the webform. Note that you cannot restore a deleted webform.
Frequently Asked Questions
Is the webform a paid feature?
No, the webform feature is available for free and in PRO spaces. All users are welcome to connect webforms to their Rock project spaces.
How many webforms can I create in a space?
There is no limit on the number of webforms that can be created in a space.
Can I edit the labels or list of a webform once created?
No, after creating a webform it is not possible to edit the configuration of the label or the list. Note that you can always create a new webform and update the URL uploaded to your website.
Can I change the fields in the webform?
Not yet! We will add further customization to webforms in future releases.
Who can create webforms in my space?
Users must have admin permissions in order to create a new webform in your space.


