Integrate your collaborative whiteboards from Miro to the Files mini-app, available in every Rock space. Use the Miro integration to quickly access retrospectives, brainstorming docs, or other important information.
How to integrate your Miro to Rock
Integrate Miro to your Rock account by following these simple steps:
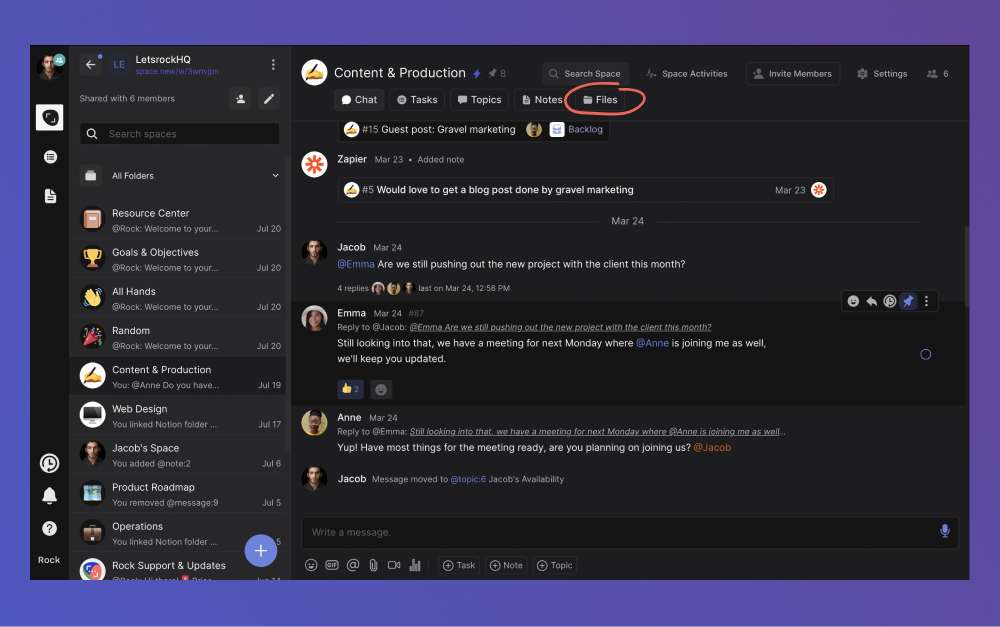
1. Select the Files Mini-app in a space
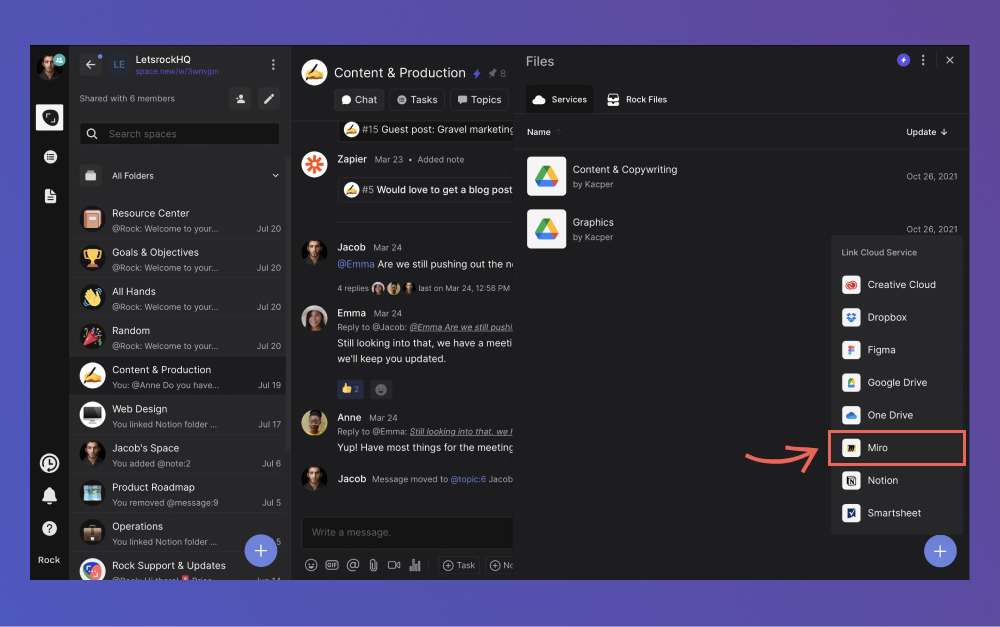
2. Select Miro from the available options (you can directly select the cloud storage provider if you have not yet added any cloud storage providers)
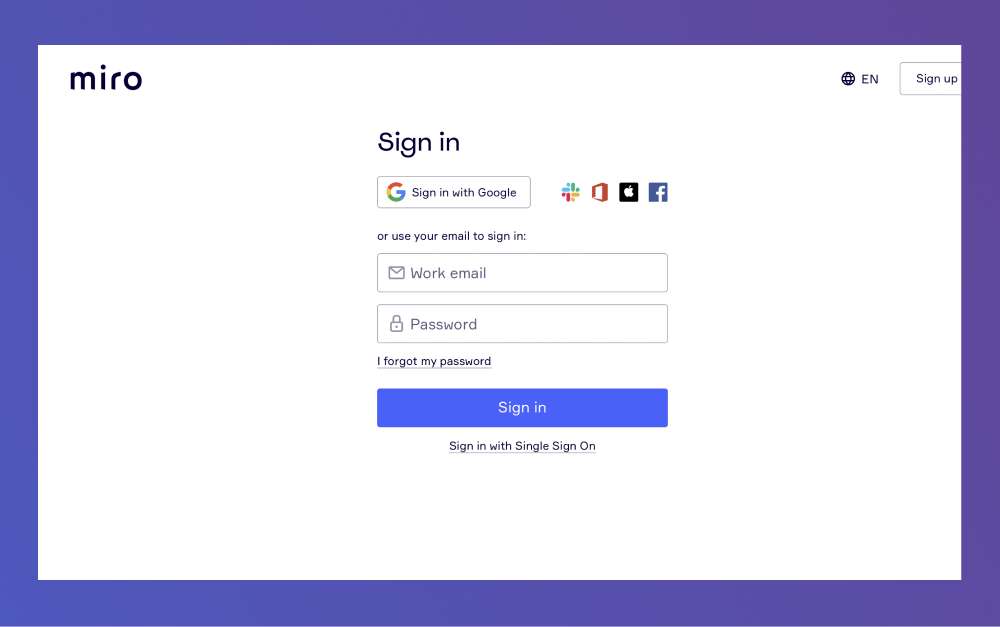
3. Log in to your Miro account
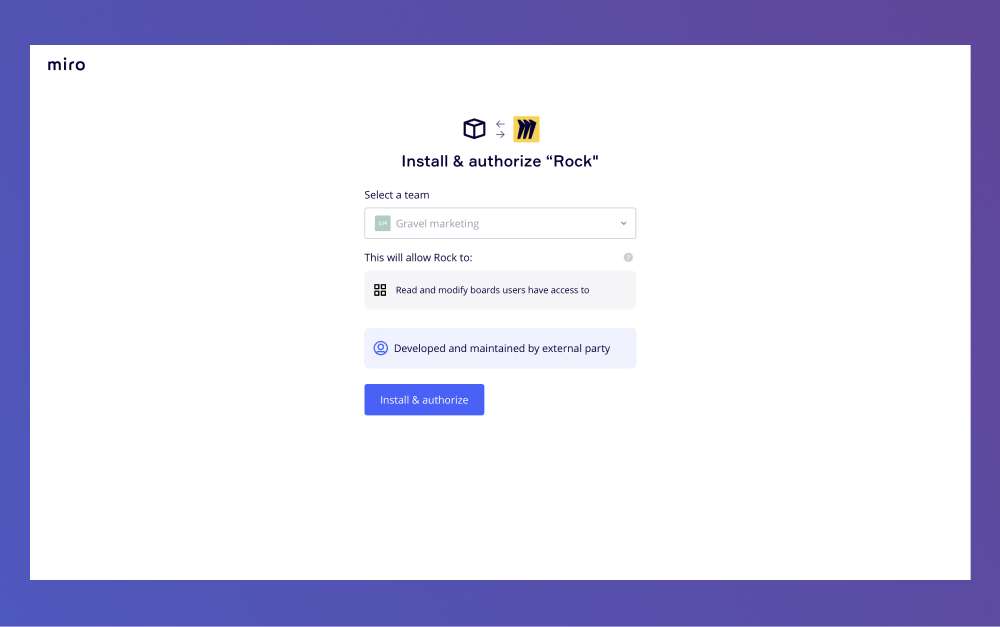
4. Click on ‘install and authorize’ in the pop-up panel to connect your team to your Rock account.
5. Select the Miro team or individual project folder that you would like to add to a space

6. Success! Your Miro integration is complete and your folder is now accessible from the Files mini-app.
You can directly add new Miro files to spaces without authorizing your account again. This way you can update the Files mini-app across other spaces with new Miro integrations if relevant.
Managing the Miro files from your integration
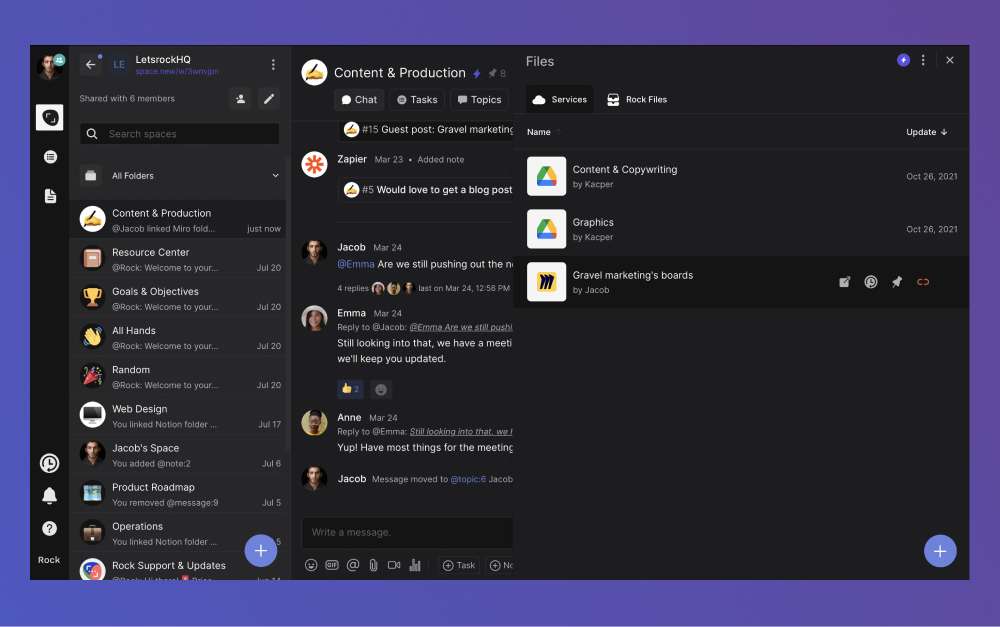
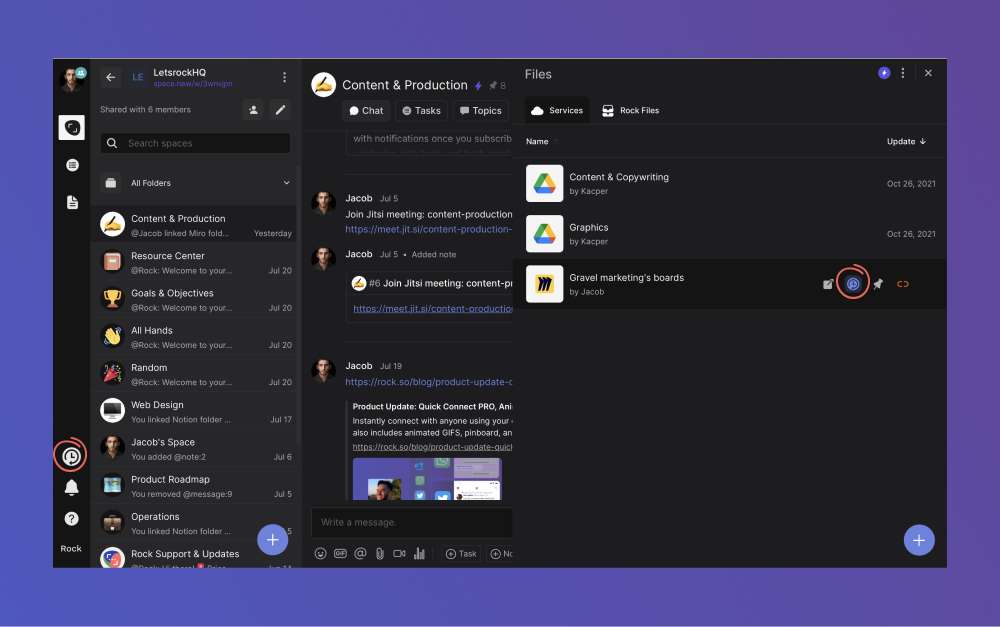
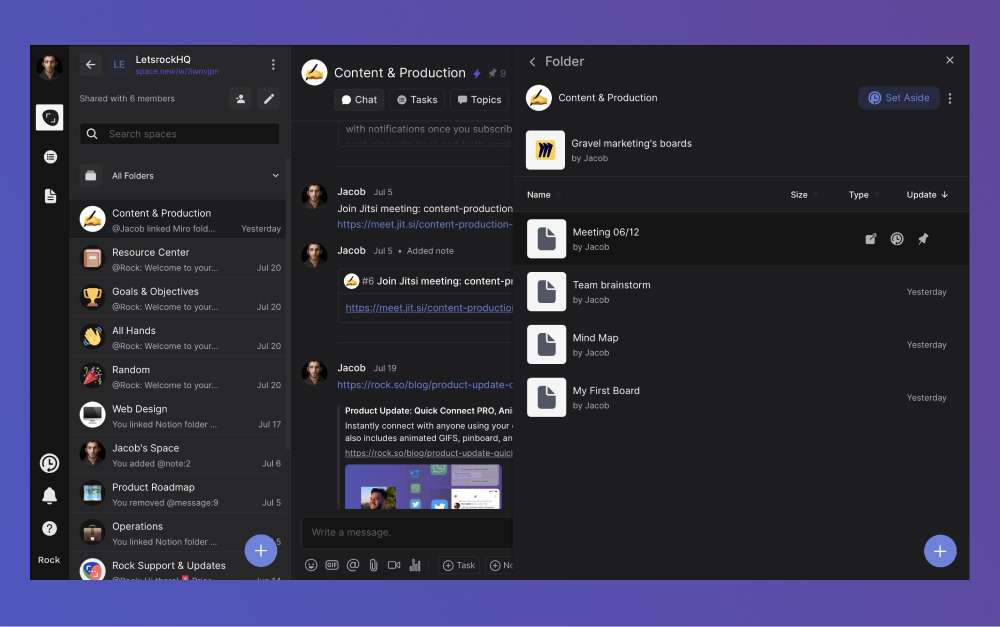
There are a few different features you can use once your Miro folder has been integrated into the Files mini-app: navigate to the folder, Set Aside, Pinboard, unlink the folder, manage individual files, create new drawings.
Navigate to the folder
Click on this icon to directly visit your Miro whiteboard. Everyone in the space has access to the files mini-app and can navigate to the files on Miro as long as they have the correct Miro permissions.
📝 Note: You need to grant space users permission on Miro for files to become fully accessible to them. If not, they can view the file name on Rock but not access them on Miro.

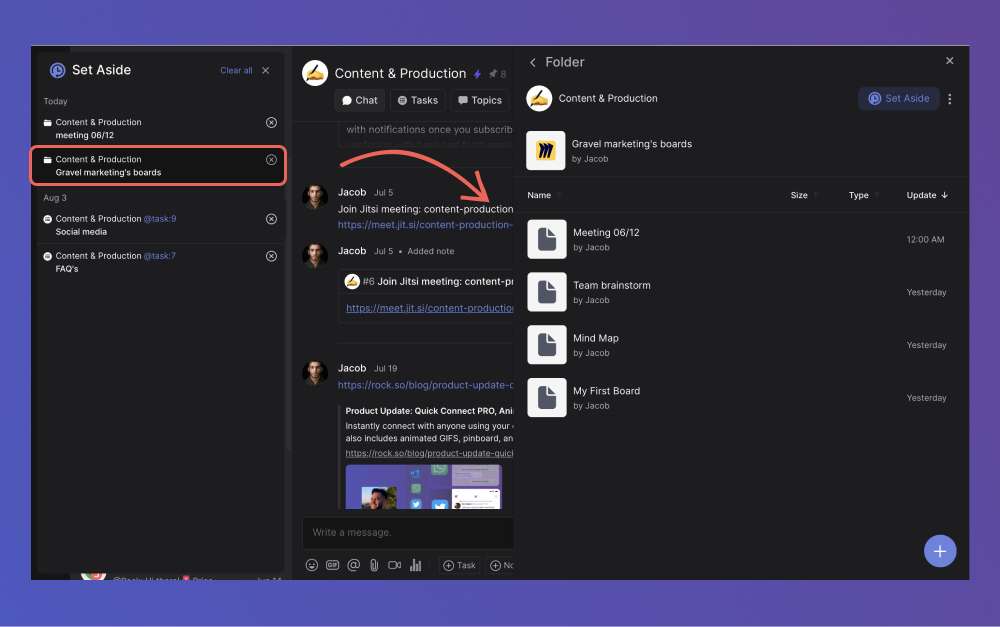
Set Aside project folders for later review
Set Aside is a unique Rock feature that allows you to add objects such as messages, tasks, notes, and cloud files to a dedicated panel. This is useful if you want to keep information from your Miro integration at hand while browsing through different spaces, or setting a small to-do list for yourself.
The icon will turn blue when the folder is added to Set Aside. Click on the same icon again to remove it from the panel.
Once added to the Set Aside panel, you can access your information by clicking on the ‘Set Aside’ button in the bottom left corner of your screen (see screenshot above).
- Directly enter the folder on Rock by clicking on it in the panel.
- You can remove the folder from within the panel by clicking on the (x).
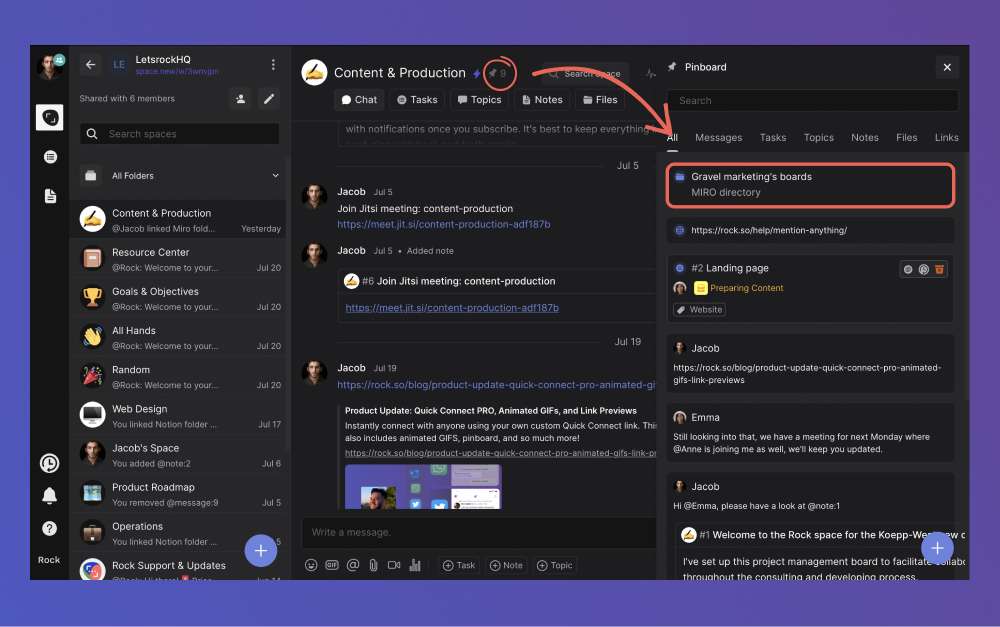
Access Miro files directly from the Pinboard
The Pinboard is a PRO feature available at the top of the space. Pin messages, tasks, notes, topics and even cloud files to your pinboard for seamless information access.
This can be useful if any information is particularly relevant to the team, announcements, or a task that everyone needs to complete or check out. When you click on the pin icon, it will be added to a dedicated panel with pinned information from that space.
You can access your pinned items by clicking on the pin next to the space name.Clicking on the file from the pinboard will directly bring you to Miro, not the folder location in the Files mini-app. You can learn more about the pinboard in particular in this dedicated product guide.
Unlink the Miro folder from the Files mini-app
You can unlink folders from your Miro integration by pressing the red unlink button. You can also unlink folders other space members have added as long as you have admin permissions in the space.
Unlinking a folder automatically removes the item from the pinboard, Set Aside panel, and cloud attachments on tasks, notes, and topics.

Manage individual files
You can manage files within a Miro team by clicking on the folder.
- Navigate to the file: Directly browse to your document from Rock.
- Set Aside a file: Clicking on the object from the Set Aside panel will directly bring you to the on Miro.
- Pinboard: Pin relevant files, clicking on them from the pinboard directly brings users to the file on Miro, not its location in the Files mini-app.
- Create new drawings/files: Click on the blue + sign in the bottom right corner of your screen. You can then name and create new whiteboards to your Miro team directly from within Rock.
📝 Note: It might take some time for your drawing to appear. We’re working on further building out the Miro integration in one of the upcoming releases.
How to attach cloud files to notes, tasks or topics
You can directly attach cloud files from the Miro integration to the description of notes, tasks and topics. This is convenient if your files are directly related to any communications or workflow on Rock. Instead of adding a link or searching for the relevant files, you can set up a direct connection in the object description.
To add a Miro file to any task, note or topic:
1. Scroll down to the object description and select ‘Add attachment’.
2. Select ‘Link Cloud Storage’ from the option menu.
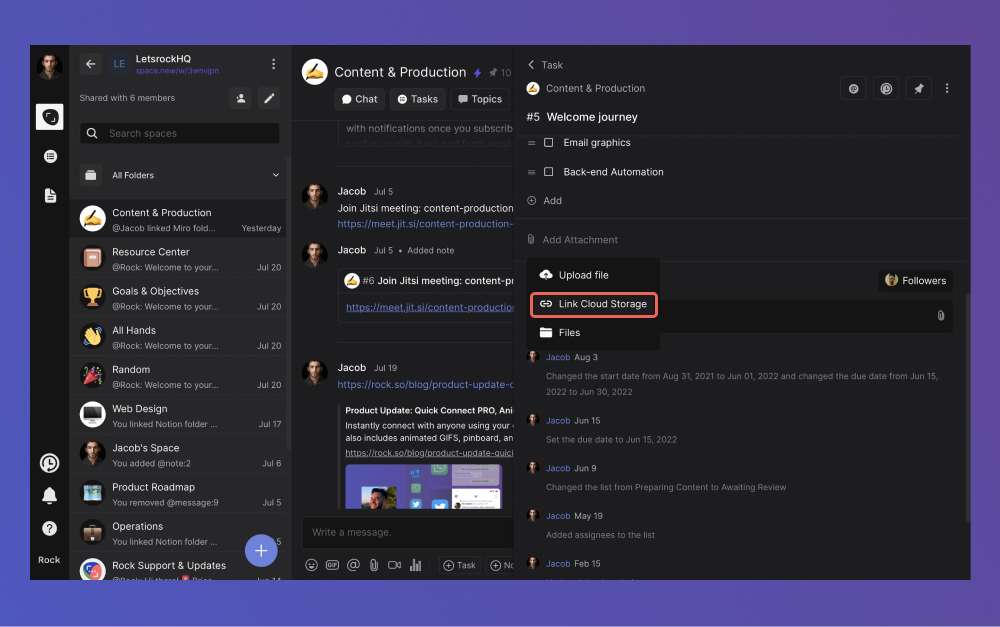
3. Select the Miro folder you want to attach or click on it to browse to a file stored in it.
4. Select the relevant file(s) to be attached to the task, note or topic description.
5. Confirm ‘Add attachments’ in the bottom right corner of the panel.
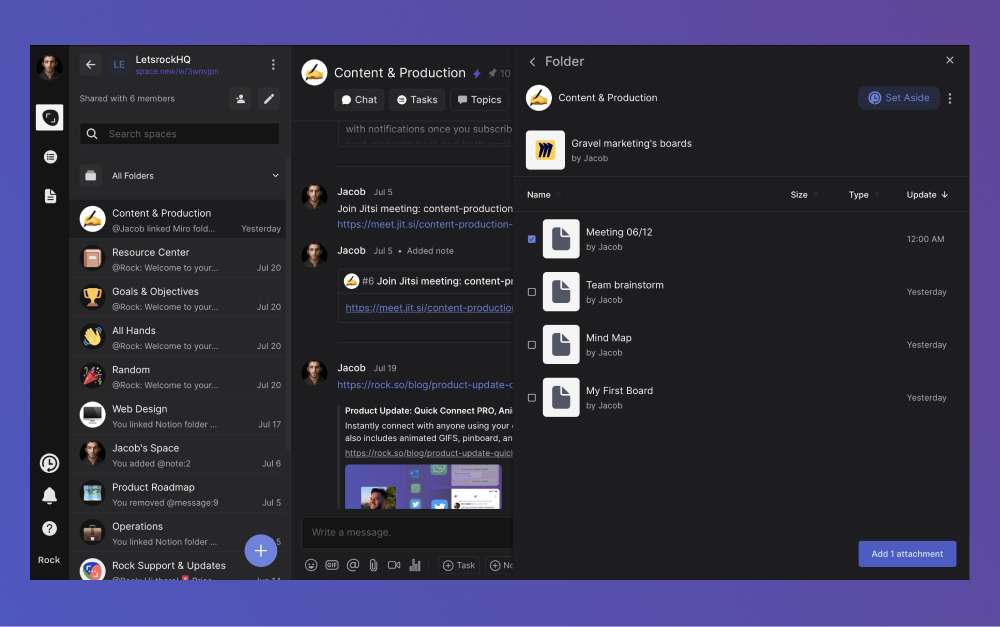
Success! Your Miro files are now attached to an object. Users within a space can directly click on it to navigate to the relevant whiteboard. Don’t forget to save the task in the top right corner of your screen.
You can remove an attached file by hovering over it and selecting the (x) on the right side.

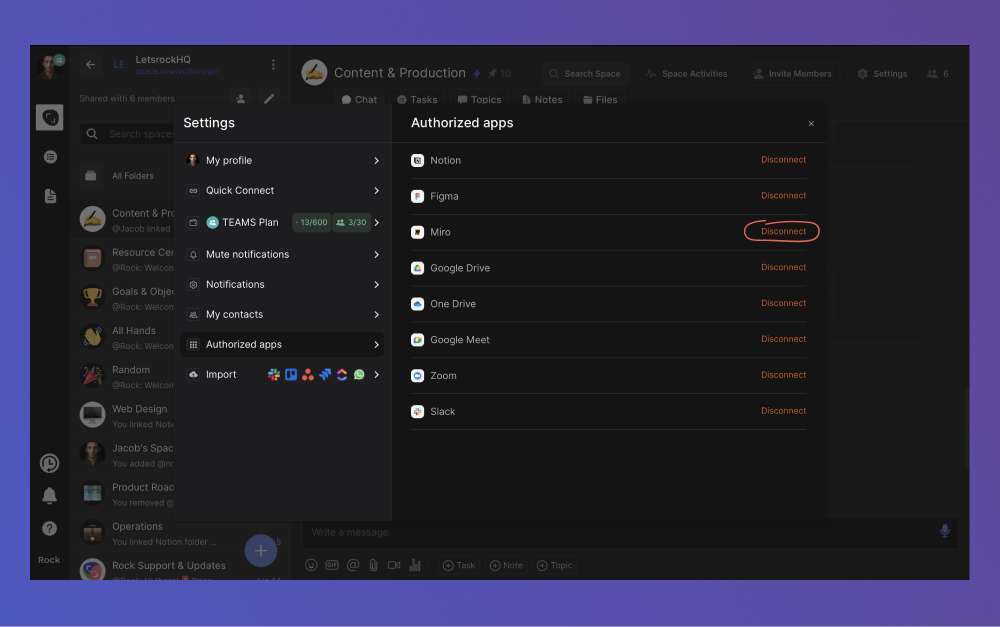
How to remove the Miro integration
You can remove your Miro integration from your account through your user settings. Note that this will unauthorize all files and folders that you have so far added to your different Rock spaces.
In order to remove your Miro integration, go to user settings > authorized apps > click disconnect for Miro and confirm. Your integration is now fully removed from your account.
📝 Note: folders are still visible in spaces but cannot be accessed, you will have to manually remove them if you don’t want them in the view.
Questions & Answers
Is the Miro integration free?
The Miro integration is completely free! Integrate your team and add as many whiteboards, brainstorm documents or other files you have stored on Miro!
Do I have to authorize my account multiple times?
No, you only have to authorize your account the first time you add a file. Subsequent uploads in the same or other spaces do not require additional authorization from you.
Can space members directly access the files I add?
File access depends on how you configured permissions on Miro. If a user has access to Miro they will be able to directly browse the file. If not, you might have to adjust your user permissions on Miro for the user to access the information directly from Rock.
Cloud attachments are not appearing in the Tasks mini-app, what should I do?
Switch from board to list view and search for the task. The functionality should appear when entering the task from list view. If you can still not attach a file please reach out to us in the Rock Customer Support space or through this link.
Can I authorize multiple teams to the same Rock account?
No, it is currently only possible to authorize one account at a time.
Do I receive credits for integrating Miro into my account?
Yes! You receive 5 credits for authorizing your account. Learn about other activities in the credit program here.
Can I integrate other cloud file storage providers in the same way?
Yes! Integrate Google Drive, Dropbox, Onedrive, Smartsheet, Notion, Figma and Adobe Creative Cloud to the Files mini-app for free in every space!


